Starting in 2007, Microsoft, AMD, Intel, and top-tier PC manufacturers have adopted UEFI as the standard BIOS model. This new standard is applicable to the entire industry and is supported by the Unified Extended Firmware Interface Forum.
As Operating Systems become obsolete and unsupported, many businesses are faced with the challenge to upgrade existing infrastructure and operating systems. This can cause hurdles and even blocks when planning an upgrade path for existing virtualized operating systems.
One of the most popular Hypervisors today, Microsoft’s Hyper-V, includes many features for virtual machine management, but one blockade many IT professionals are faced with is when there is a requirement to change a Hyper- V Generation 1 VM to Generation 2. The challenge with this upgrade is that you cannot simply upgrade an existing virtual machine to Gen 2. While there are very technical and in-depth write-ups for configuring the existing virtual machine to work with Gen 2 virtualization, there is a much easier solution, which caters to efficiency, uptime, and no data loss.
-
- Create a copy of the VHD(s) you are converting to VHDX.
- Turn off the virtual machine
- Locate the location of the VHDs and make a copy
- This is only temporary, store on backup drives until new Gen2 Machine is confirmed working
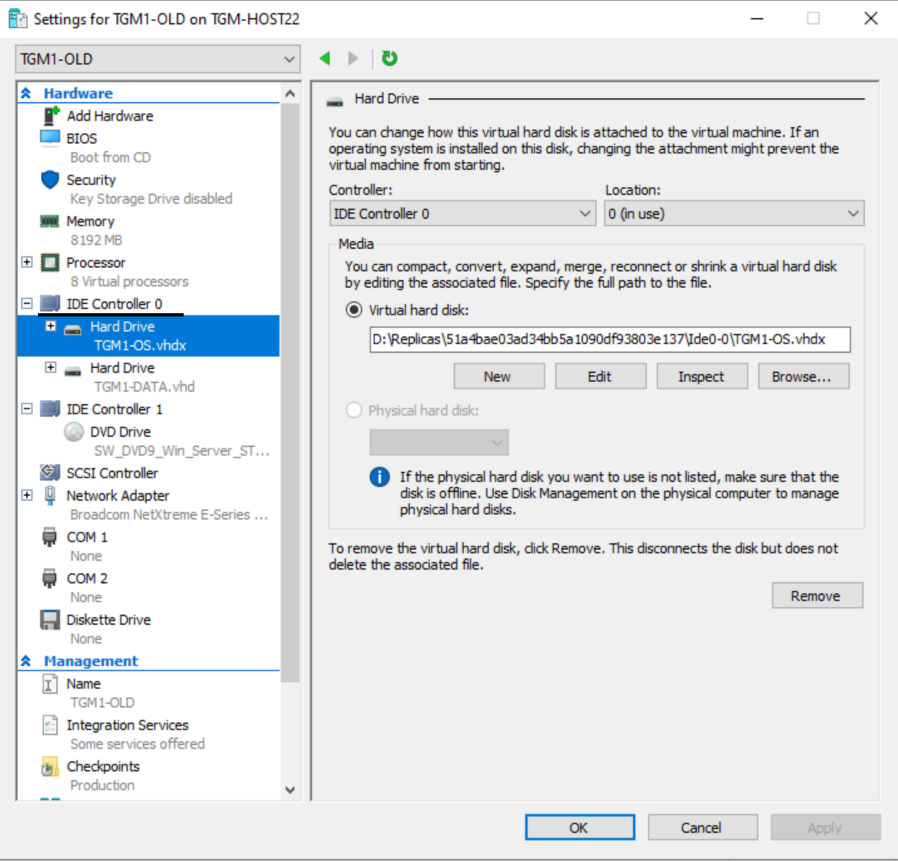
- Once the backup copy of the VHD(s) is complete, open the Settings for the Virtual Machine, on the left-hand side, select the IDE controller containing the virtual disks (Should be IDE Controller 0), and then click on edit
- Create a copy of the VHD(s) you are converting to VHDX.
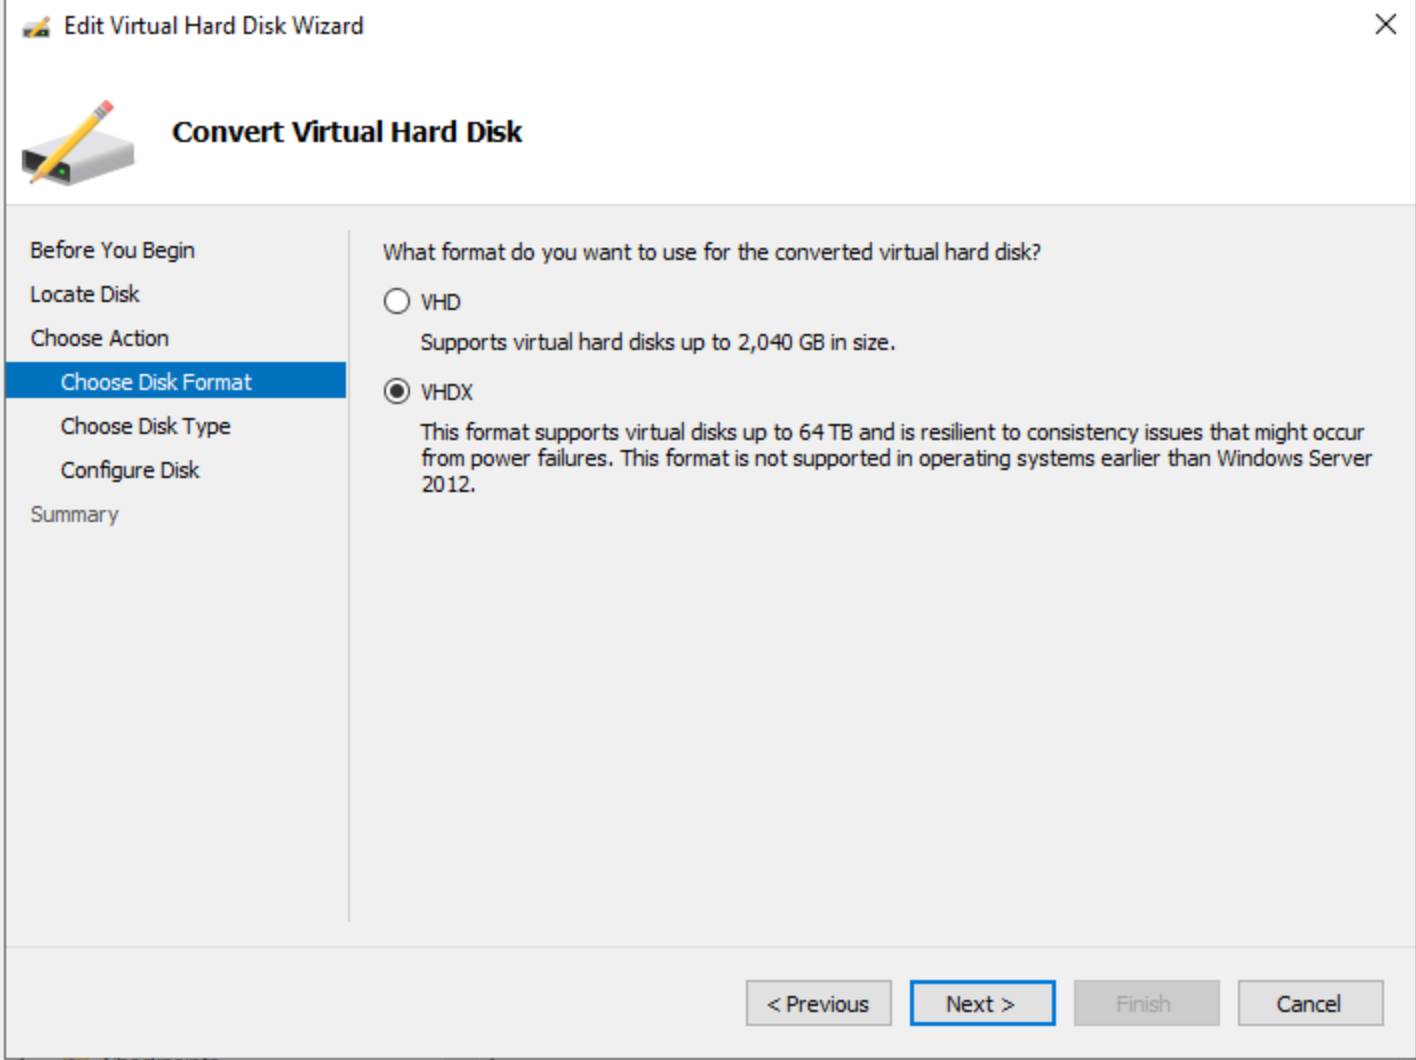
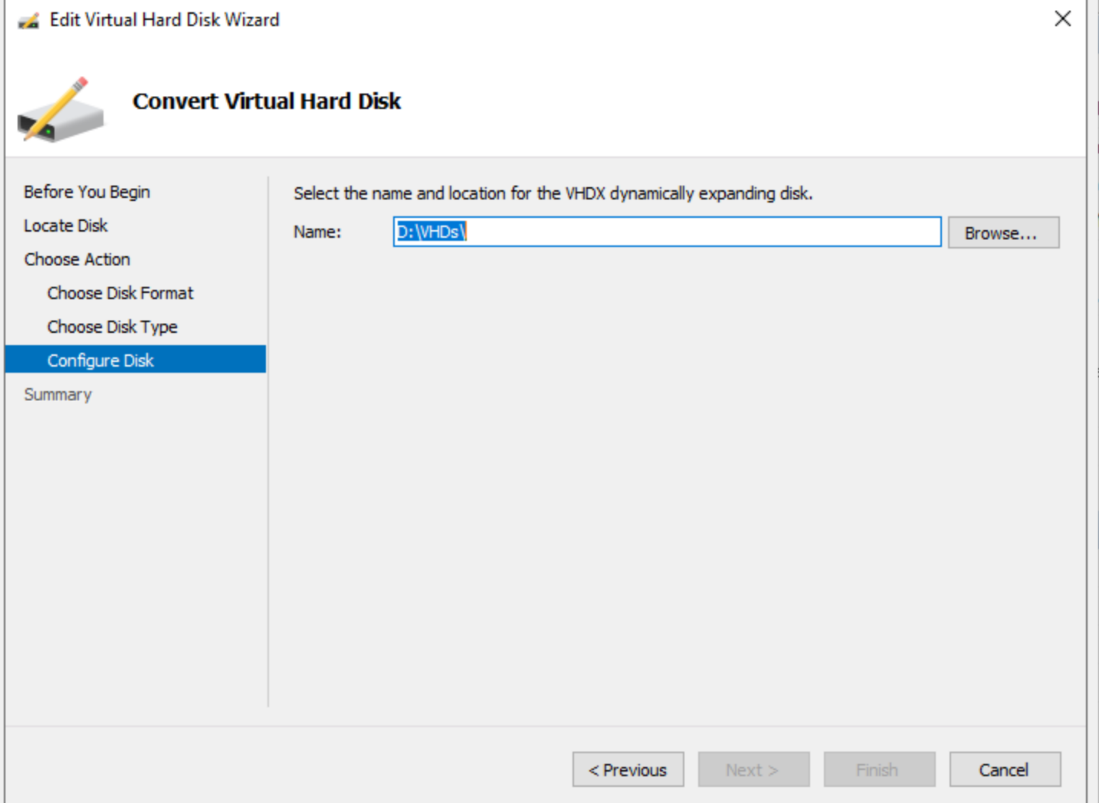
Select the option to Convert the disk

Select VHDX
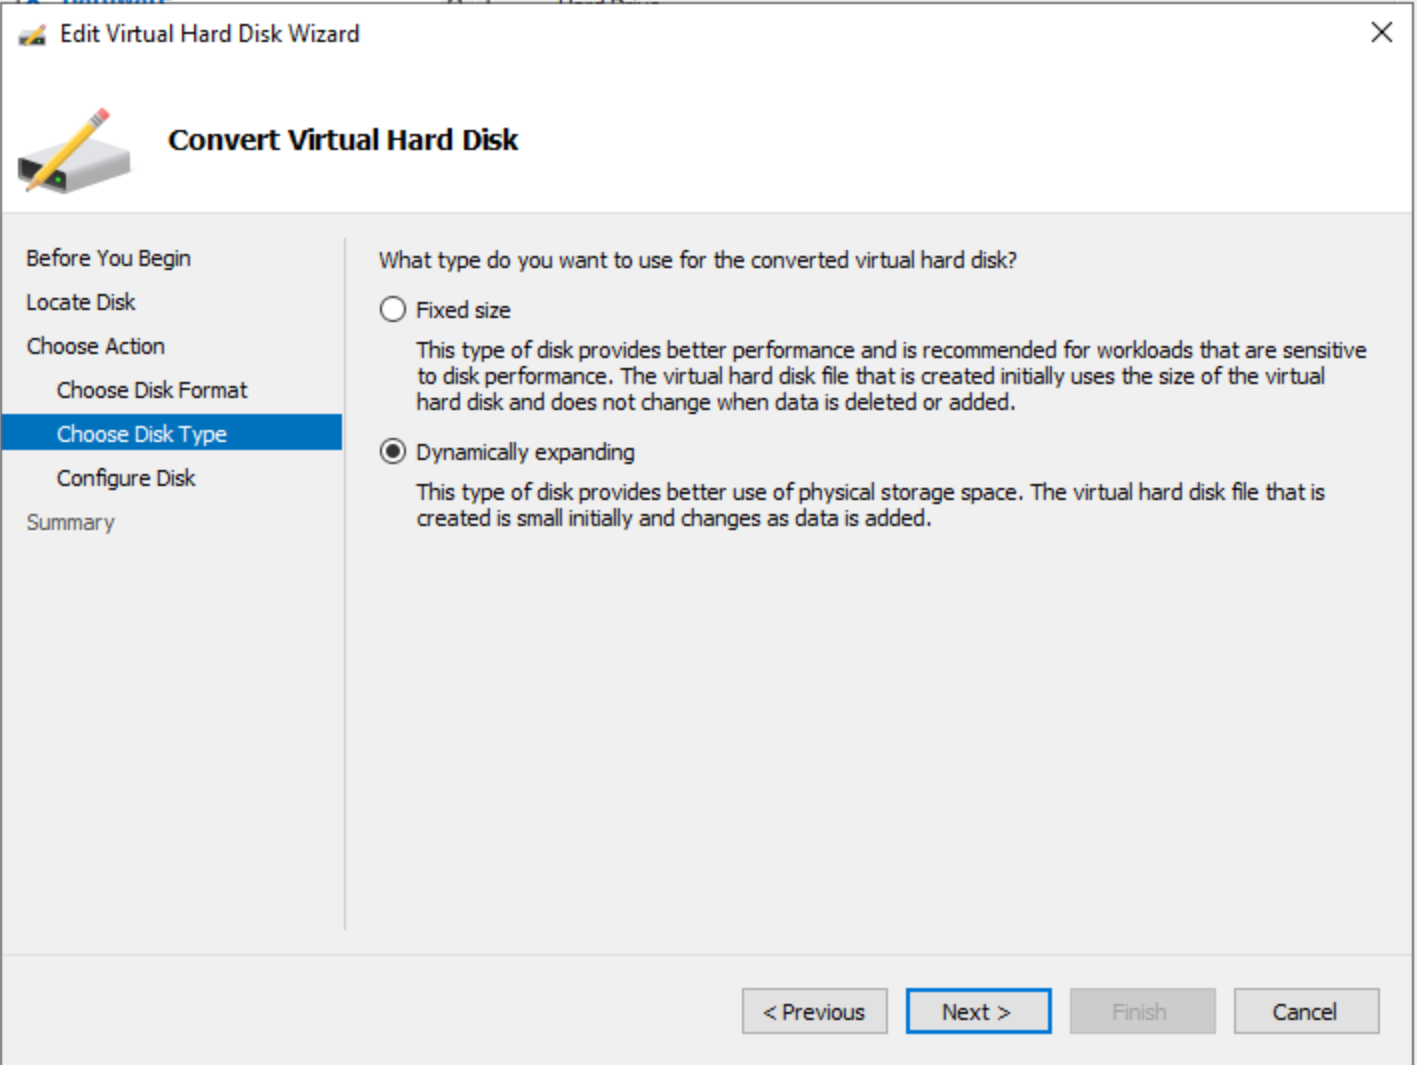
Select Fixed or Dynamic depending on the configuration needs (99% of the time will be Dynamic for our use case)
Make note of the Save location for the converted disks and begin the conversion process. Depending on the speed of storage drives installed on the host and the size of the virtual disk, this make take up to 2 hours.
-
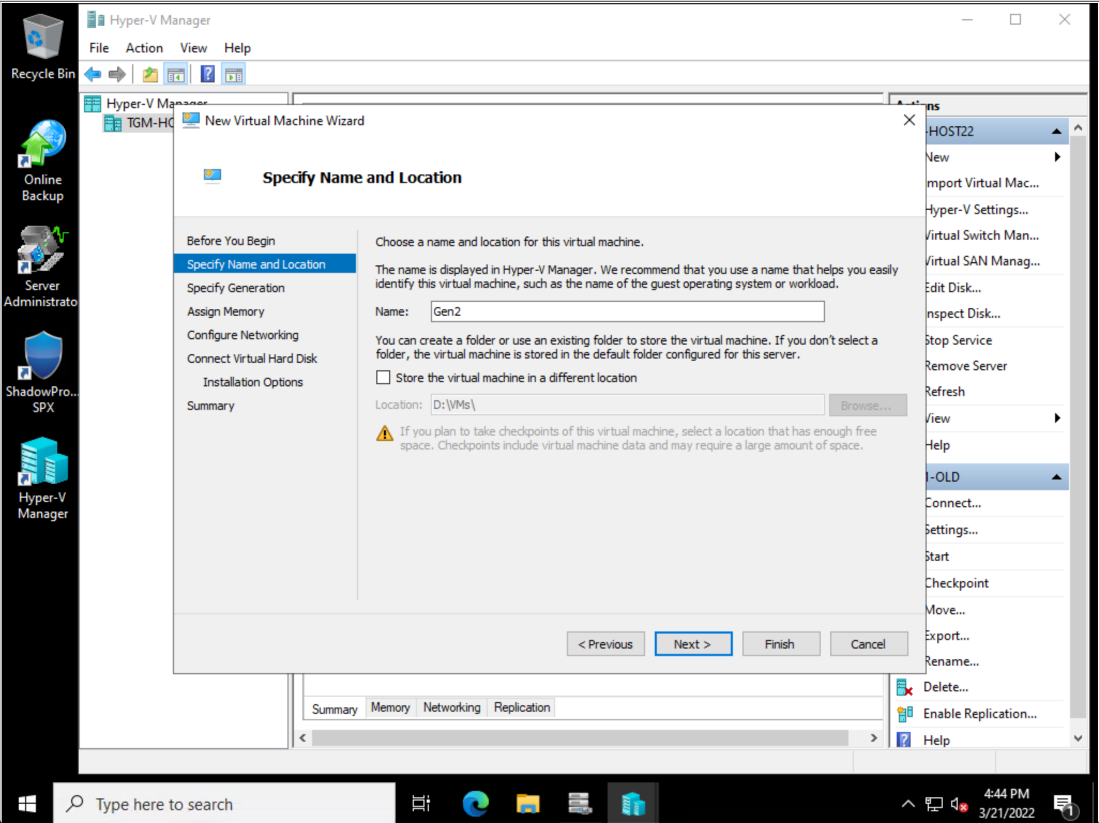
- Once the conversion is completed, create a NEW virtual machine and do NOT create any new virtual disks and ensure you select the option to "Add Operating System Later"
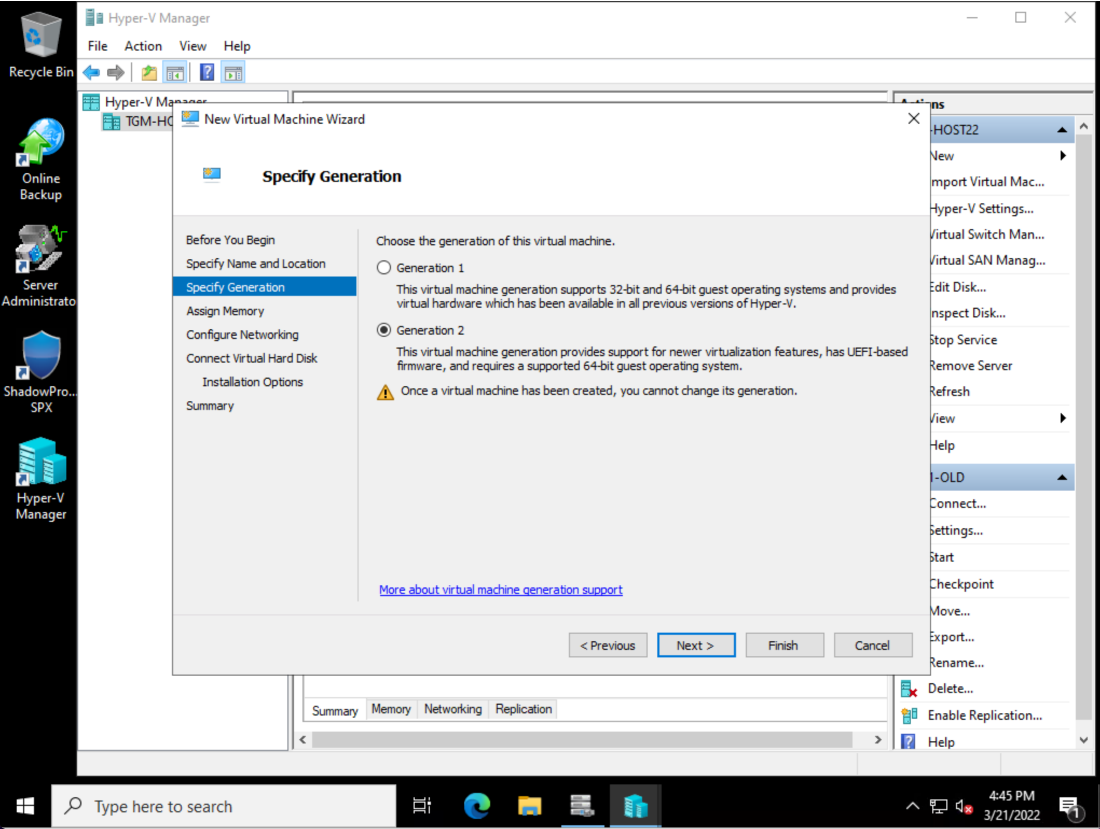

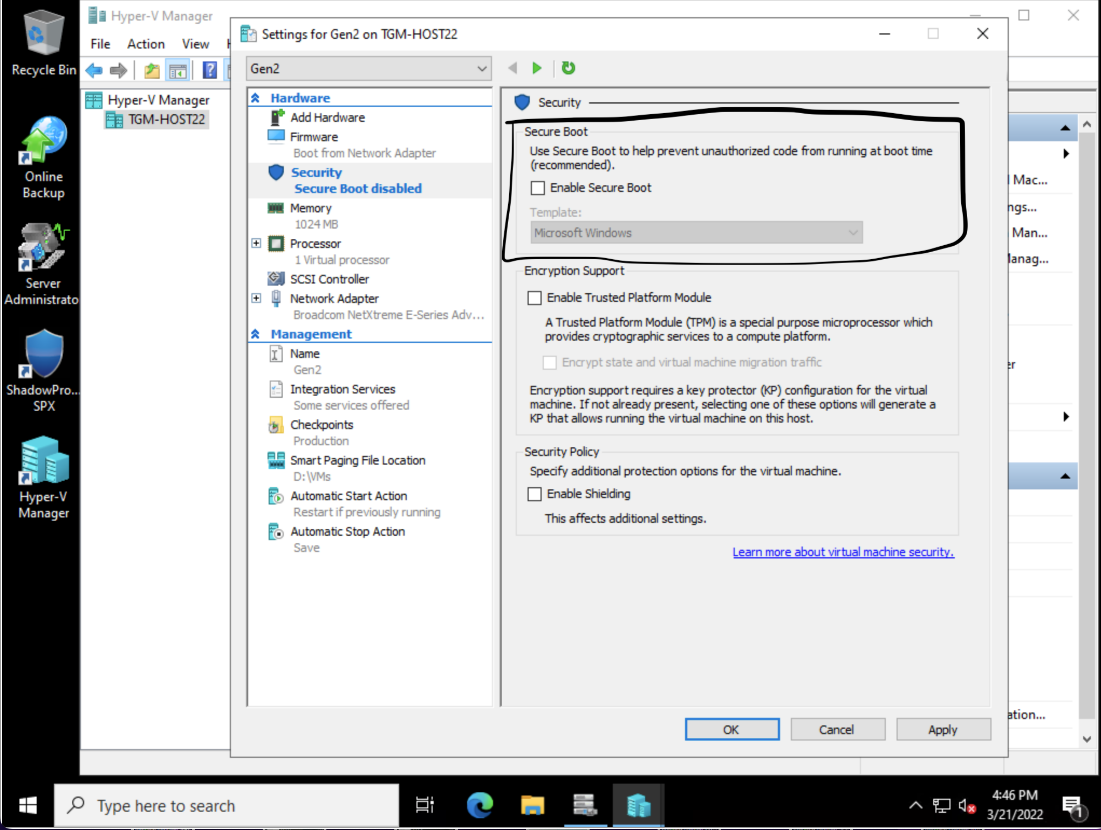
Once the new Gen2 VM is created you must ENSURE THAT SECURE BOOT IS UN-CHECKED
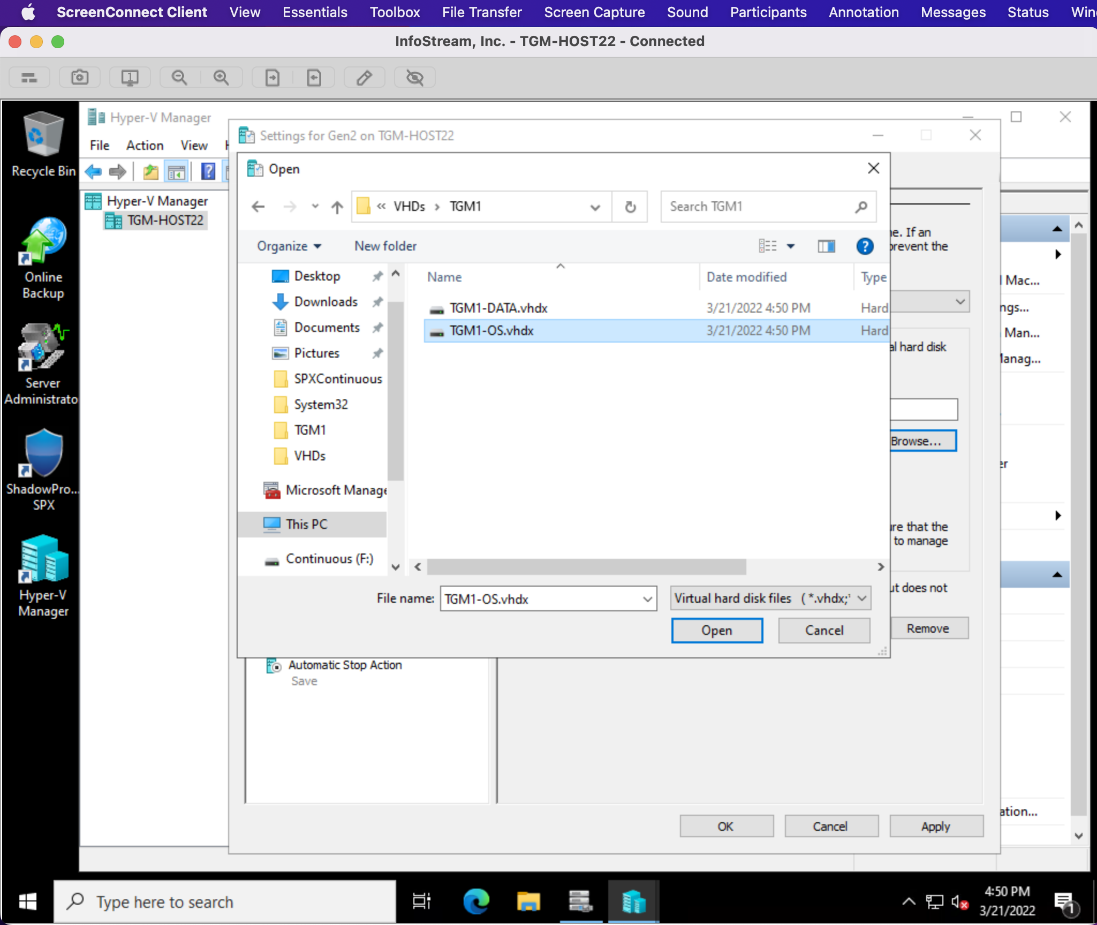
Attach the newly converted VHDX(s) drives to the SCSI Controller
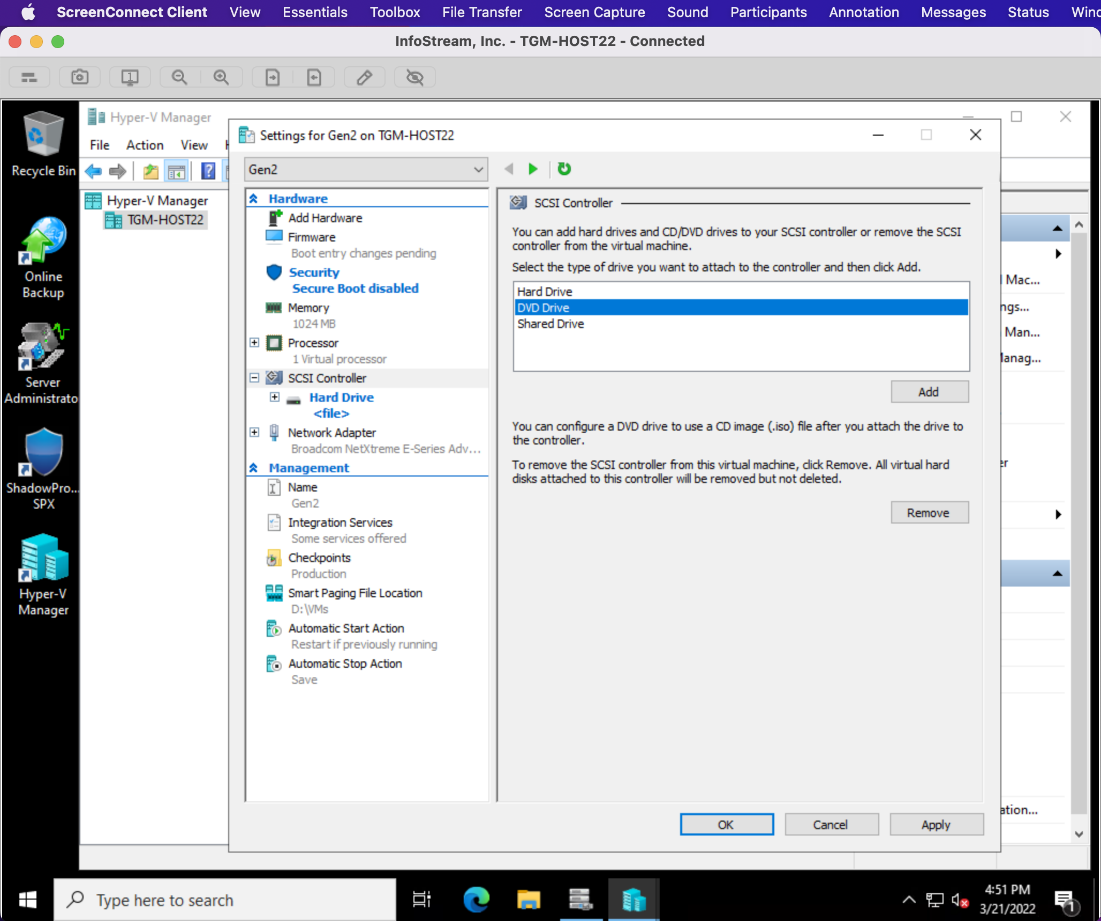
Browse for the VHDX(s) you are needing to convert and add to the VM.
-
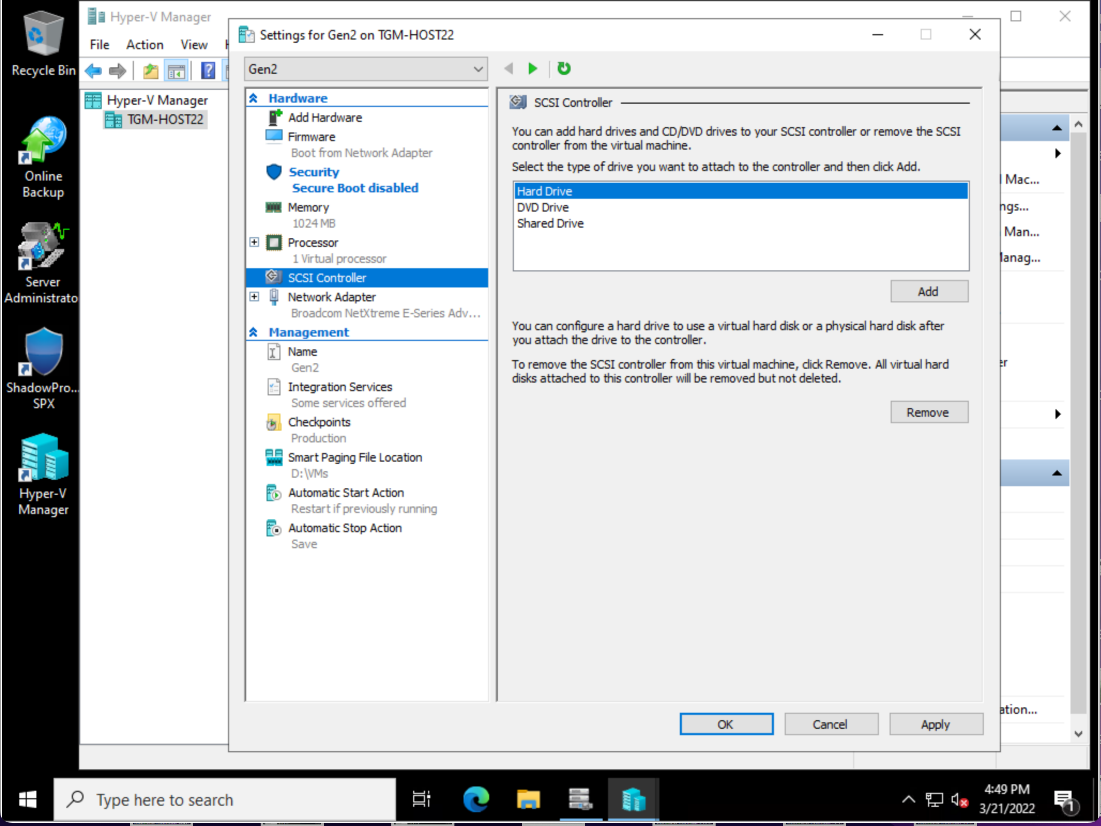
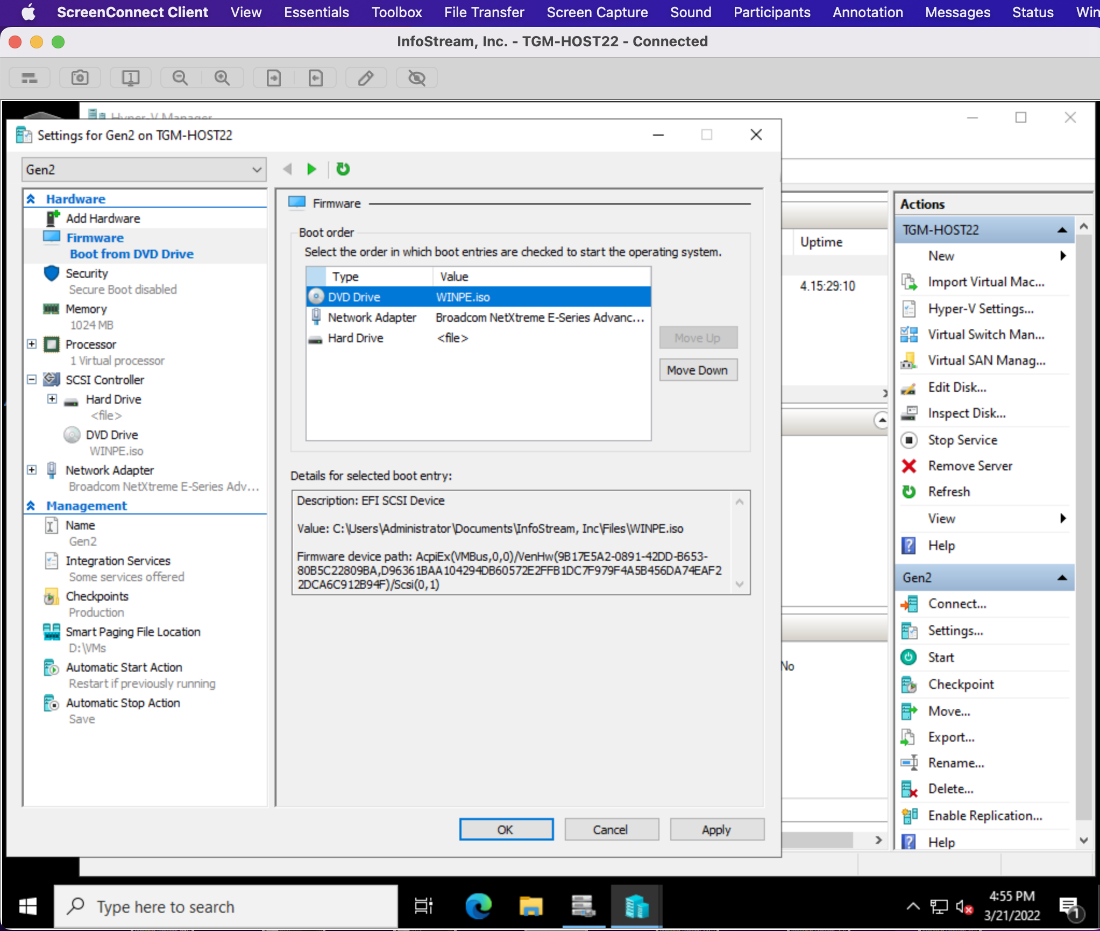
- Ensure that the Gen2 Virtual machines settings are still open, go back to SCSI Controller on the left-hand side, and add in DVD Drive
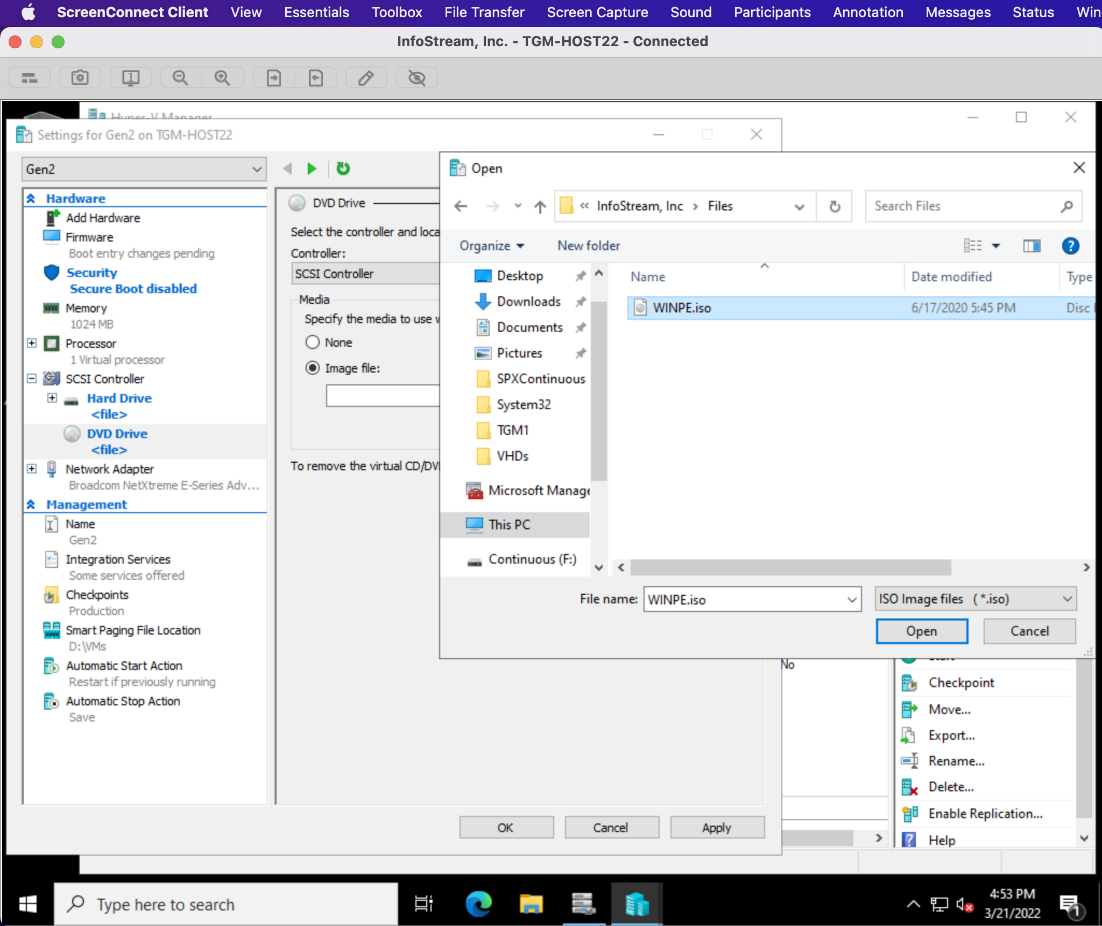
Once the virtual DVD drive has been added specify the location to the downloaded WINPE ISO
-
- Still in the Gen2 virtual machine Settings; under the Firmware section in the left hand side, ensure that the DVD drive/ISO is the first device within the boot order
Boot into the PreBoot Environment and wait for the Command Prompt to appear. Once the command prompt is up, using the MBR2GPT tool, convert the newly attached virtual disk(s) partition table from MBR -> GPT.
Type in the following command to validate the partition table: mbr2gpt /disk:0 /validate
Type in the following command to convert the partition table to GPT: mbr2gpt /disk:0 /convert
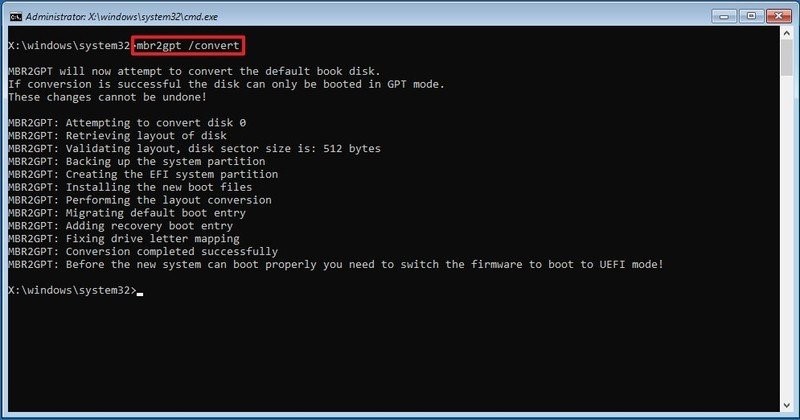
***If only converting one disk, it will always be disk 0.
- Power off the virtual machine and disconnect the ISO from the virtual DVD drive. Re-enable SecureBoot. Change the boot order to the virtual drive containing windows and boot.
Before performing any upgrades, please check the software and consult with vendors to ensure your upgrade path is supported by your business applications and software. Always remember to take snapshots along the way in the event that a change needs to be reverted.
By upgrading to Gen 2, not only are you making your infrastructure up-to-date and aligned with current IT practices, you are also hardening security. Running Generation 2 virtual machines on supported hardware, you gain the ability to enable Secure Boot, TPM, and the ability to run shielded virtual machines, provided by Microsoft’s Host Guardian Services. All are must-haves when running any virtualized environment in the modern IT era.
Should you need help with this and are in our area, please don't hesitate to contact us for West Palm Beach IT Support!