Microsoft 365 has some amazing productivity and collaborative tools already built in.
Did you know that within Teams there’s a useful project planning tool?
Watch our short video for the lowdown on how to use Microsoft Planner.
Video script:
Got big plans for your business this year?
Whatever you want to achieve, Microsoft Planner can help you to organize tasks, assign them to team members, and check the progress along the way.
To get started, create a team in Microsoft Teams. Add the people responsible for helping to complete tasks in your plan.
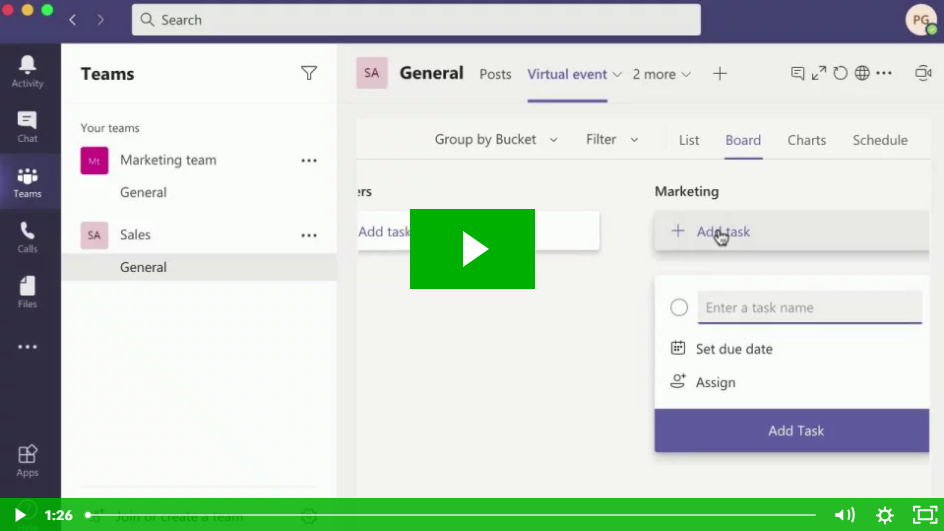
Next click on the + icon, and then the Planner tab. Create a new plan and give it a name. When you do this, members of the team will be alerted that a plan’s been created.
Next, you can create ‘buckets’ of work. For example, if you were organizing a virtual event, you could have a bucket for attendees, one for speakers, one for marketing, and so on. Within each bucket you can set tasks with deadlines and assign them.
When you click into each task you get a more detailed view. Set a priority, add notes and attachments, comments, and even break the task down into sub-tasks.
Click on Charts at the top of the Planner screen, and you can see the progress of each task, in chart form.
Click on Schedule to get a calendar view of when each task is due to be completed. We like to think of it as the ultimate collaborative to do list!
If you want some help getting this set up for your business, or anything else to do with Microsoft 365, get in touch.